1. Document Information

1.1. Abstract

This document explains the procedure to generate the SSH key pair in Linux and Windows environment.

1.2. Document Convention

Icon Meaning Description
Note Provides information good to know
Caution Indicates situation that might result in loss of data or hardware damage

2. SSH Keys for Linux

An SSH key is an access credential in the SSH protocol. Its function is similar to usernames and passwords, but the keys are primarily used for automated processes and for implementing single sign-on by system administrators and power users. SSH keys enable the automation that makes modern cloud services and other computer-dependent services possible and cost-effective. They offer convenient and improved security when properly managed. SSH keys are a matching set of cryptographic keys which can be used for authentication. Each set contains a public and a private key. The public key can be shared freely without concern, while the private key must be vigilantly guarded and never exposed to anyone.

2.1. Generate SSH Keys

Follow the steps below to generate an SSH Key in Linux command shell:

  • Step 1. In the Linux Terminal, enter the following:
    ssh-keygen -t rsa -b 4096 -C .

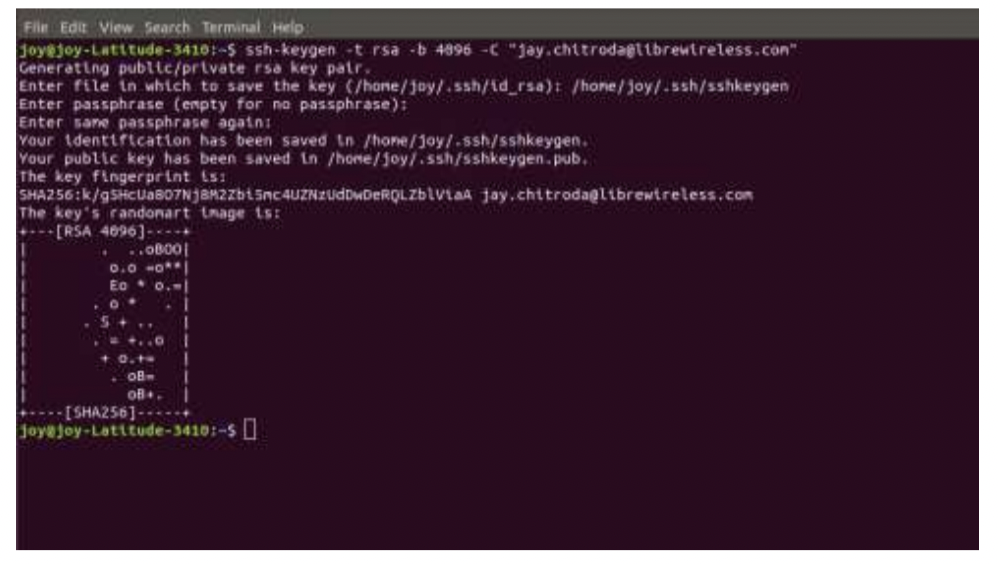
    Figure 2-1: Linux Terminal Screen

  • Step 2. By default, the system will save the keys to “/home/user_name/.ssh/id_rsa”. User can use the default name as "id_rsa" or you can choose more descriptive names as "/home/user_name/.ssh/". This can help to distinguish between keys if the user is using multiple key pairs. To stick to the default option, press Enter For more information: https://manpages.ubuntu.com/manpages/focal/man1/sshkeygen.1.html
  • Step 3. User will be asked to enter a passphrase. Press Enter to skip this step
  • Step 4. The system will generate the key pair and display the key fingerprint and a random art image
  • Step 5. Navigate to “/home/user_name/.ssh/”.
  • Step 6. User will see two files. The identification is saved in the "id_rsa" file, or "" and the public key is labelled "id_rsa.pub" or "". This is the SSH key pair

2.2. Adding SSH Key to the ssh-agent

Before adding a new SSH key to the ssh-agent to manage the keys, user should check for existing SSH keys and generate a new SSH key. Start the ssh-agent in the background

  • $ eval "$(ssh-agent -s)"
    Output → Agent pid 59566

Once the ssh-agent is running, the following command will add the new SSH key to the local SSH agent

  • $ ssh-add /home/user_name/.ssh/id_rsa
  • Output → Identity added: /home/user_name/.ssh/id_rsa (/home/user_name/.ssh/id_rsa)

The new SSH key is now registered and ready to use.

3. SSH Keys for Windows

3.1. Generate SSH Keys in Windows with OpenSSH Client

This section explains the steps to generate an SSH Key in windows with OpenSSH client.

  • Step 1. Verify if OpenSSH Client is Installed.
    • 1. Open the Settings panel, click Apps
    • 2. Under the Apps and Features heading, click Optional Features
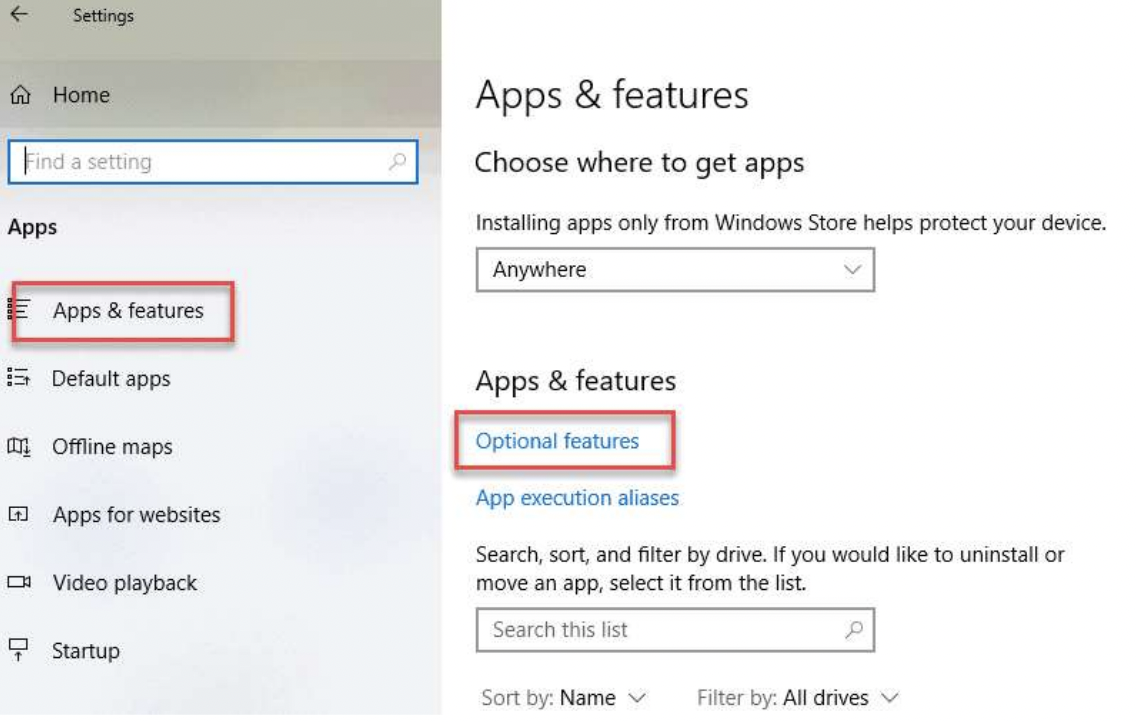
    • Figure 3.1-1: Windows Apps and Features

    • 3. Scroll down the list to see if OpenSSH Client is listed. If it is not, click the plusicon next to Add a feature. Scroll through the list and select OpenSSH Client.Finally, click Install
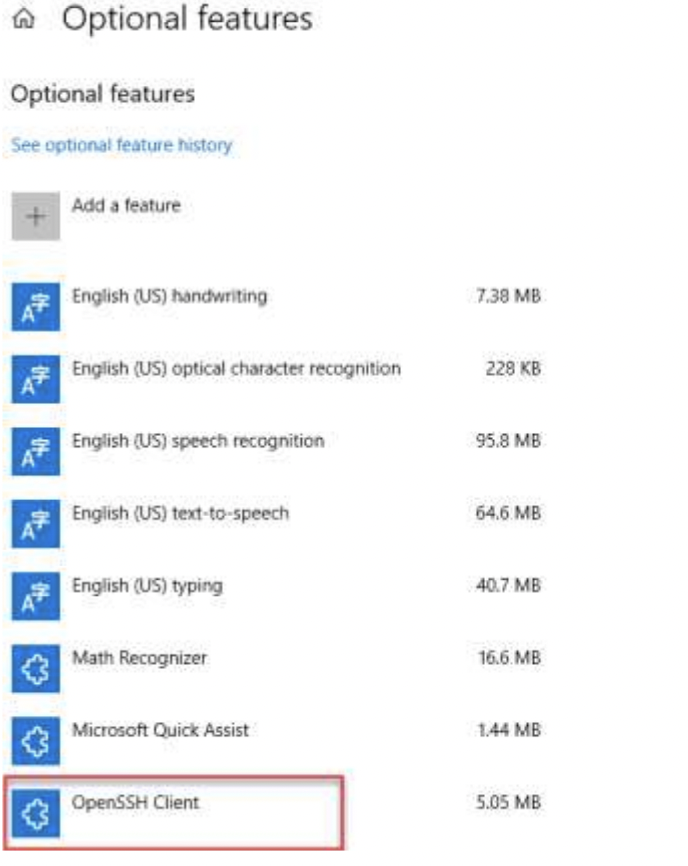
    • Figure 3.1-2: Windows Optional Features

  • Step 2. Open Command Prompt:
    • 1. Press the Windows key.
    • 2. Type cmd
    • 3. Under Best Match, right-click Command Prompt.
    • 4. Click Run as Administrator.
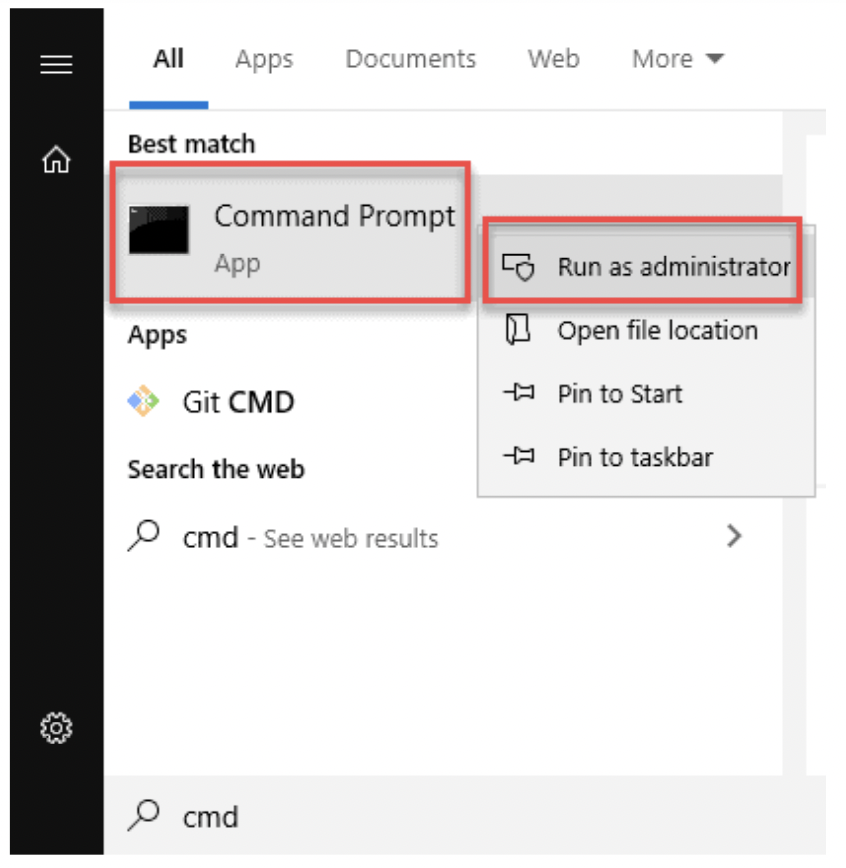
    • Figure 3.1-3: Windows Command Prompt as an Admin user

    • 5. If prompted, click Yes
  • Step 3. Use OpenSSH to Generate an SSH Key Pair:
    • 1. In the command prompt, enter the following: ssh-keygen -t rsa -b 4096 -C For more information:
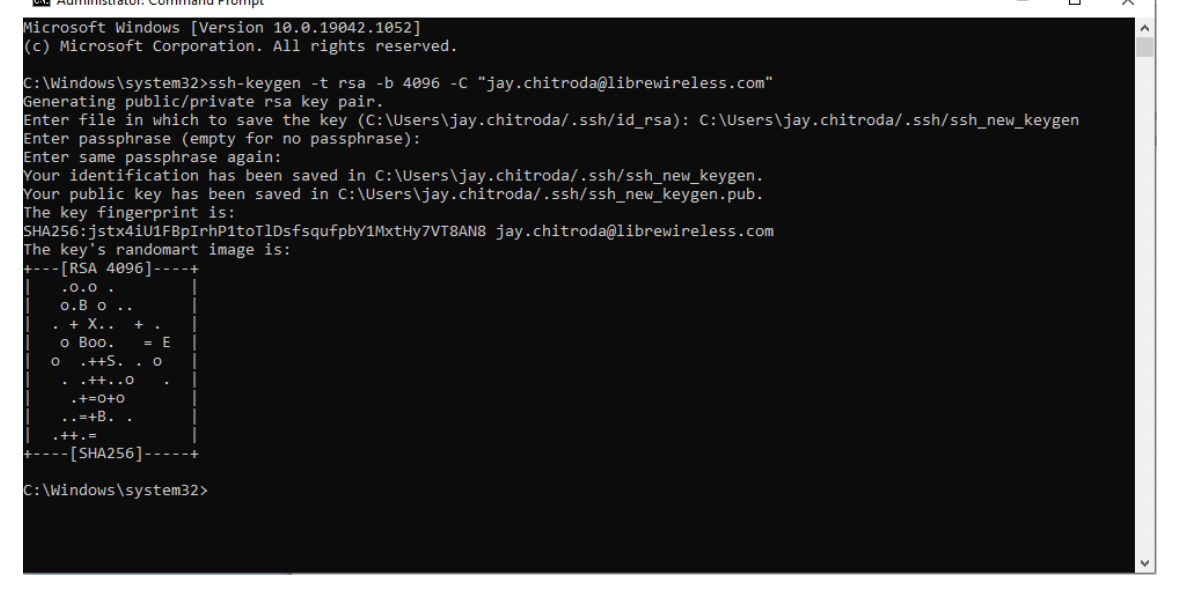
    • Figure 3.1-4: Command Prompt in Windows

    • 2. By default, the system will save the keys to “C:\Users\your_username/.ssh/id_rsa”. User can use the default name as "id_rsa", or user can choose more descriptive names as a "C:\Users\your_username/.ssh/". This can help distinguish between keys if the user uses multiple key pairs. To stick to the default option, press Enter.
    • 3. User will be asked to enter a passphrase. Click Enter to skip this step.
    • 4. The system will generate the key pair and display the key fingerprint and a random art image.
    • 5. Navigate to “C:\Users\your_username\.ssh”.
    • 6. Two files will be displayed. The identification is saved in the "id_rsa" file, or "" and the public key is labeled "id_rsa.pub" or "". This is the generated SSH key pair
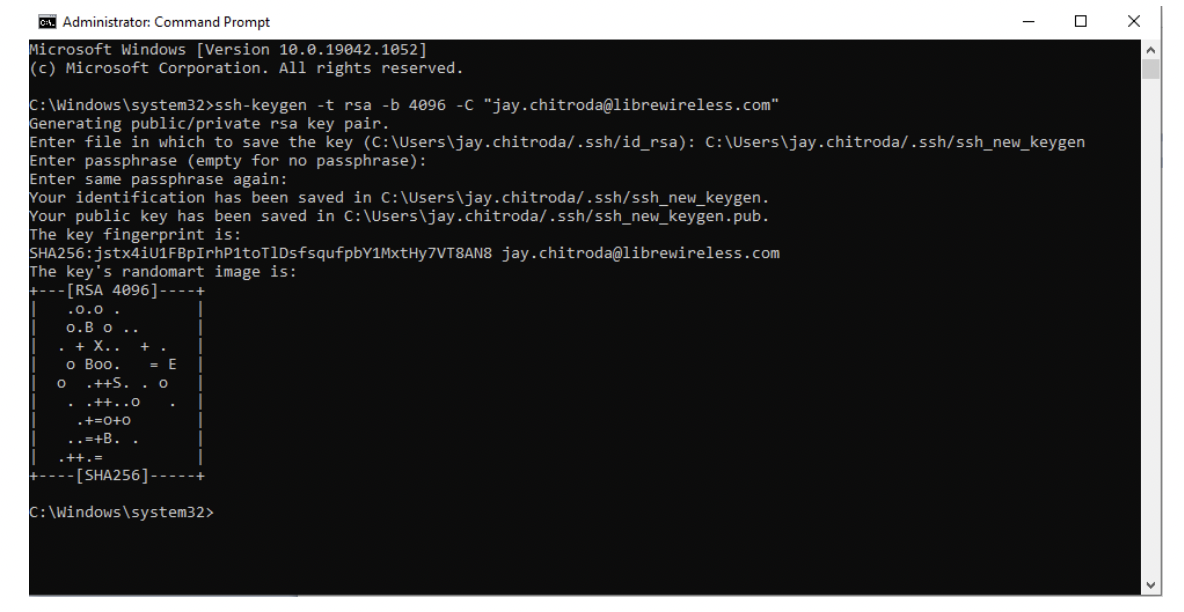
    • Figure 3.1-5: Command Prompt with Generated SSH Key

3.2. Generate SSH Keys in Windows using PuTTY

The PuTTY tool was the golden standard for generating SSH keys before OpenSSH in Windows

  • Step 1. Install PuTTY:
    • 1. Browse to the developer’s page, and download the installer for PuTTY:
    • 2. Double-click the downloaded file and follow the installation wizard to finish the installation.
    • On the initial dialog of the installation wizard, click Next.
    • Select the destination folder. Use the default installation configuration unless you have a specific need to change it. Click Next to move on to the next screen.
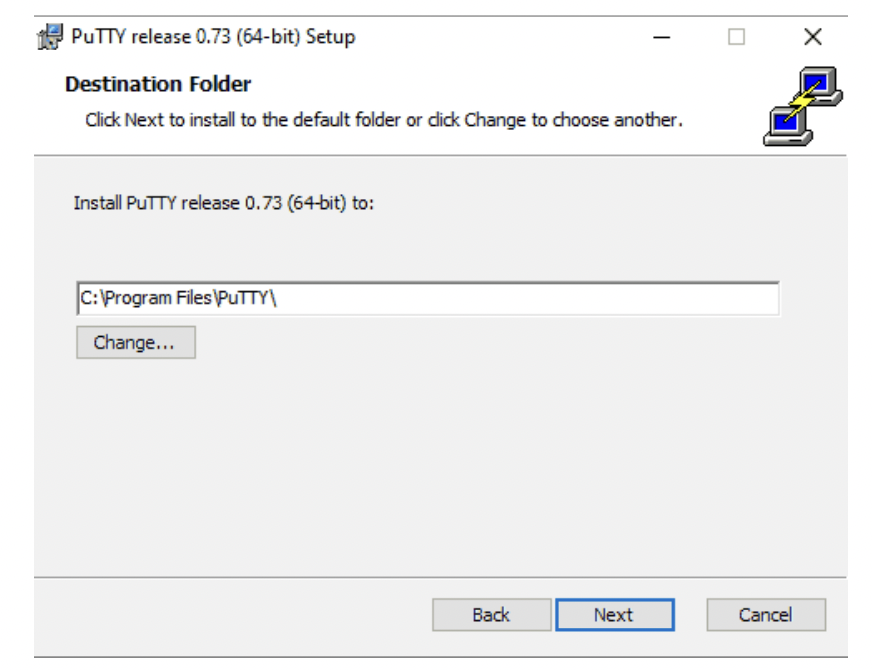
    • Figure 3.2-1: PuTTY Installation Page

    • 3. Select PuTTY product features to be installed. Stick to the defaults if the user does not have any specific needs. Click Next to move on to the next screen:
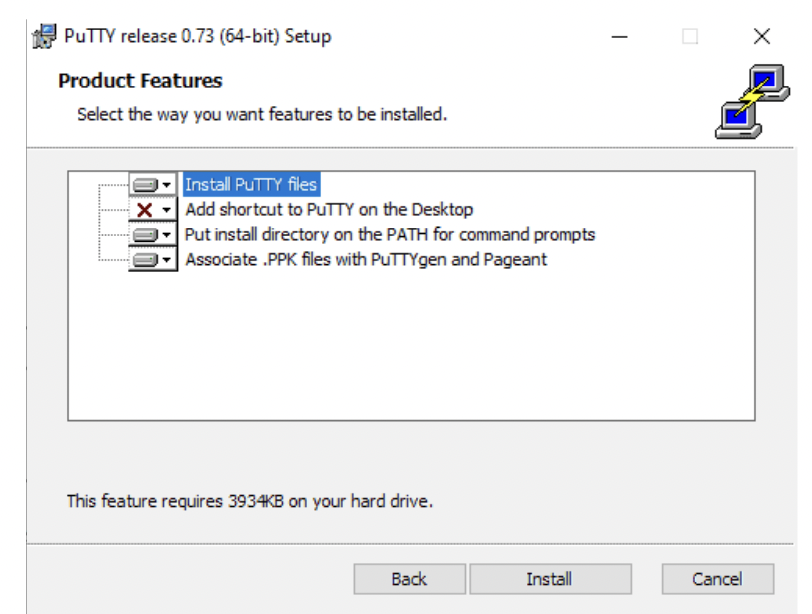
    • Figure 3.2-2: PuTTY Product Selection Page

    • Once the process is completed, click Finish to exit the installation wizard.
  • Step 2. Run the PuTTY SSH Key Generator:
    • 1. Press the Windows key.
    • 2. Type PuTTYgen.
    • 3. Under Best Match, right-click PuTTYgen.
    • 4. Click Run as administrator.
    • 5. If prompted, click Yes.
  • Step 3. Use PuTTY to Create a Pair of SSH Keys.

    The process outlined below will generate RSA keys, a classic and widely used type of encryption algorithm. The PuTTY Keygen tool offers several other algorithms – DSA, ECDSA, Ed25519 and SSH-1 (RSA).

    If the user requires a different encryption algorithm, select the desired option under the Parameters heading before generating the key pair:

    • 1. In the PuTTY Key Generator window, click Generate.
    • 2. Move the cursor around the gray box to fill up the green bar.
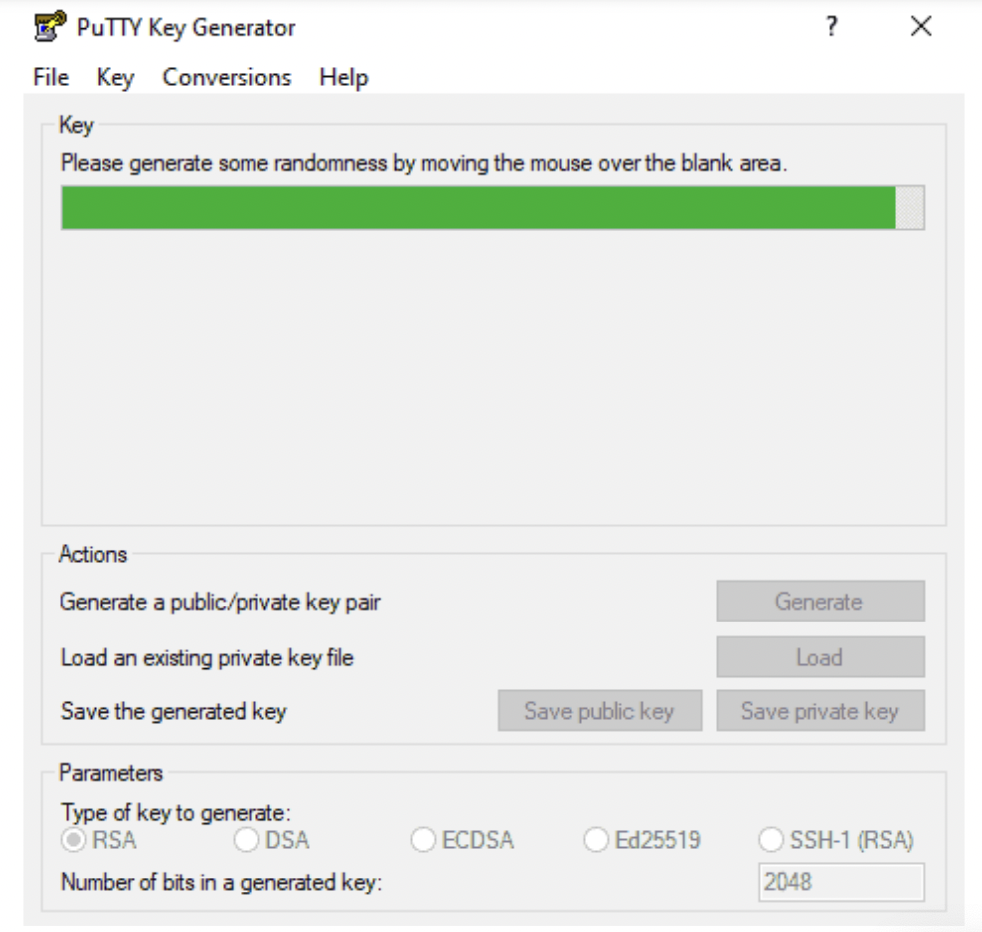
    • Figure 3.2-3: PuTTY Key Generator

    • 3. To save the public key, Click on Save public key. Choose a location as "C:\Users\yours_name/.ssh/" to save the key.
    • Enter the key name (e.g., putty_key.pub)
    • 4. Save the private key:
      Click the Conversions menu at the top.
      Click Export OpenSSH key.
      User will be asked to save a key without a passphrase. Click Yes.
      Choose a location as a "C:\Users\yours_name/.ssh/" to save the
      key (usually the same folder as the public key).
      Enter the key name (e.g., putty_key).
    • Figure 3.2-4: PuTTY Key Generator

3.3. Methods to Run ssh agent

The SSH agent must be run in the background to add SSH key.

To run SSH agent follow the below methods:

  • Method 1: Open Windows Power Shell:
    • 1. Press the Windows key.
    • 2. Type Power Shell.
    • 3. Under Best Match, right-click Power Shell.
    • 4. Click Run as Administrator.
    • 5. If prompted, click Yes.
    • 6. Enter the following commands:
      • Set-Service -Name ssh-agent -StartupType Automatic
      • Set-Service -Name ssh-agent -Status Running
  • Method 2: Manual Procedure:
    • 1. Open Services (Start Menu → Type "Services")
    • 2. Select OpenSSH Authentication Agent
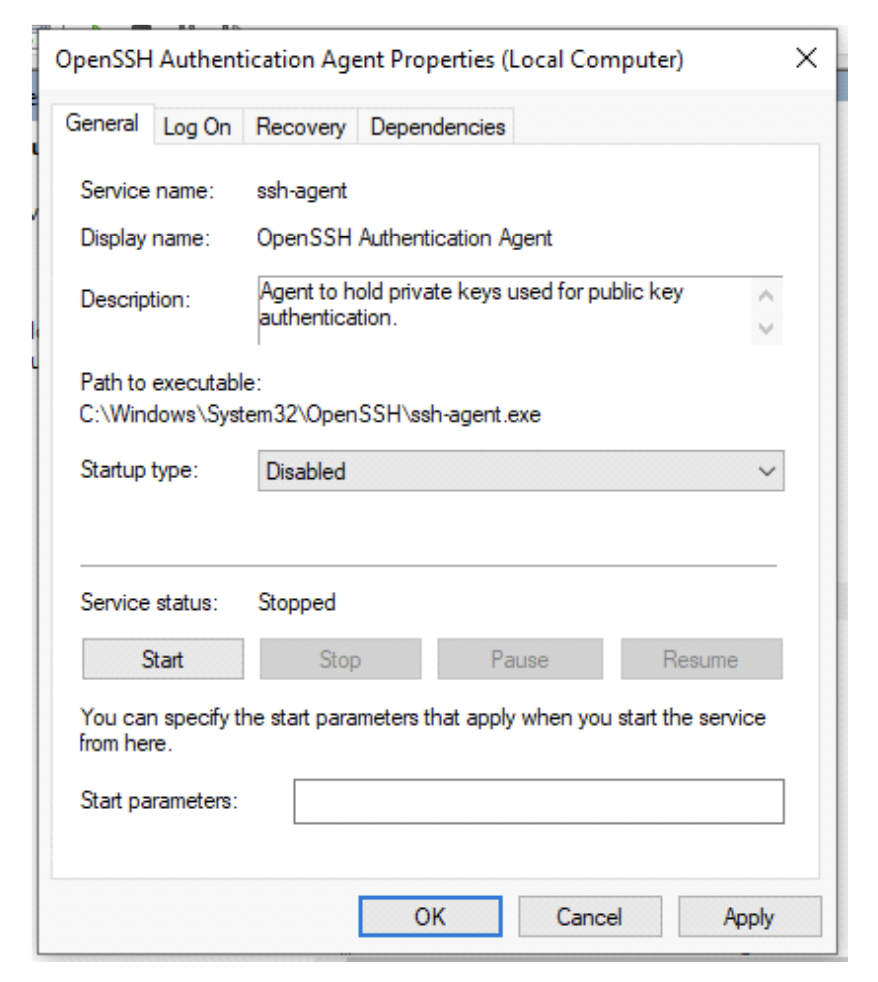
    • Figure 3.3-1: OpenSSH Authentication Agent

    • 3. Select Startup type as "Automatic" and click on Start Button,
    • 4. Click Apply and Ok.
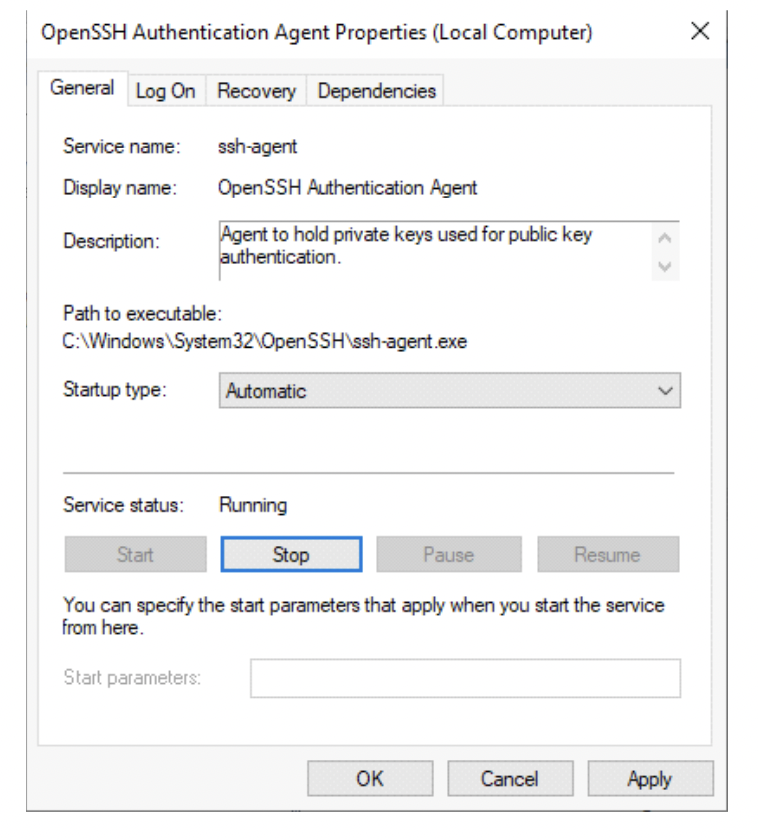
    • Figure 3.3-2: OpenSSH Authentication Agent Screen

3.4. Adding the Generated SSH Key to the ssh-agent

On successfully running the SSH agent in the background the user needs to follow these procedures to add the generated SSH key.

Enter the below command:

  • PS C:\Users\your_name> ssh-add
  • Output → Enter passphrase for C:\Users\your_name/.ssh/id_rsa:
  • Output → Identity added: C:\Users\your_name/.ssh/id_rsa
  • Reference: